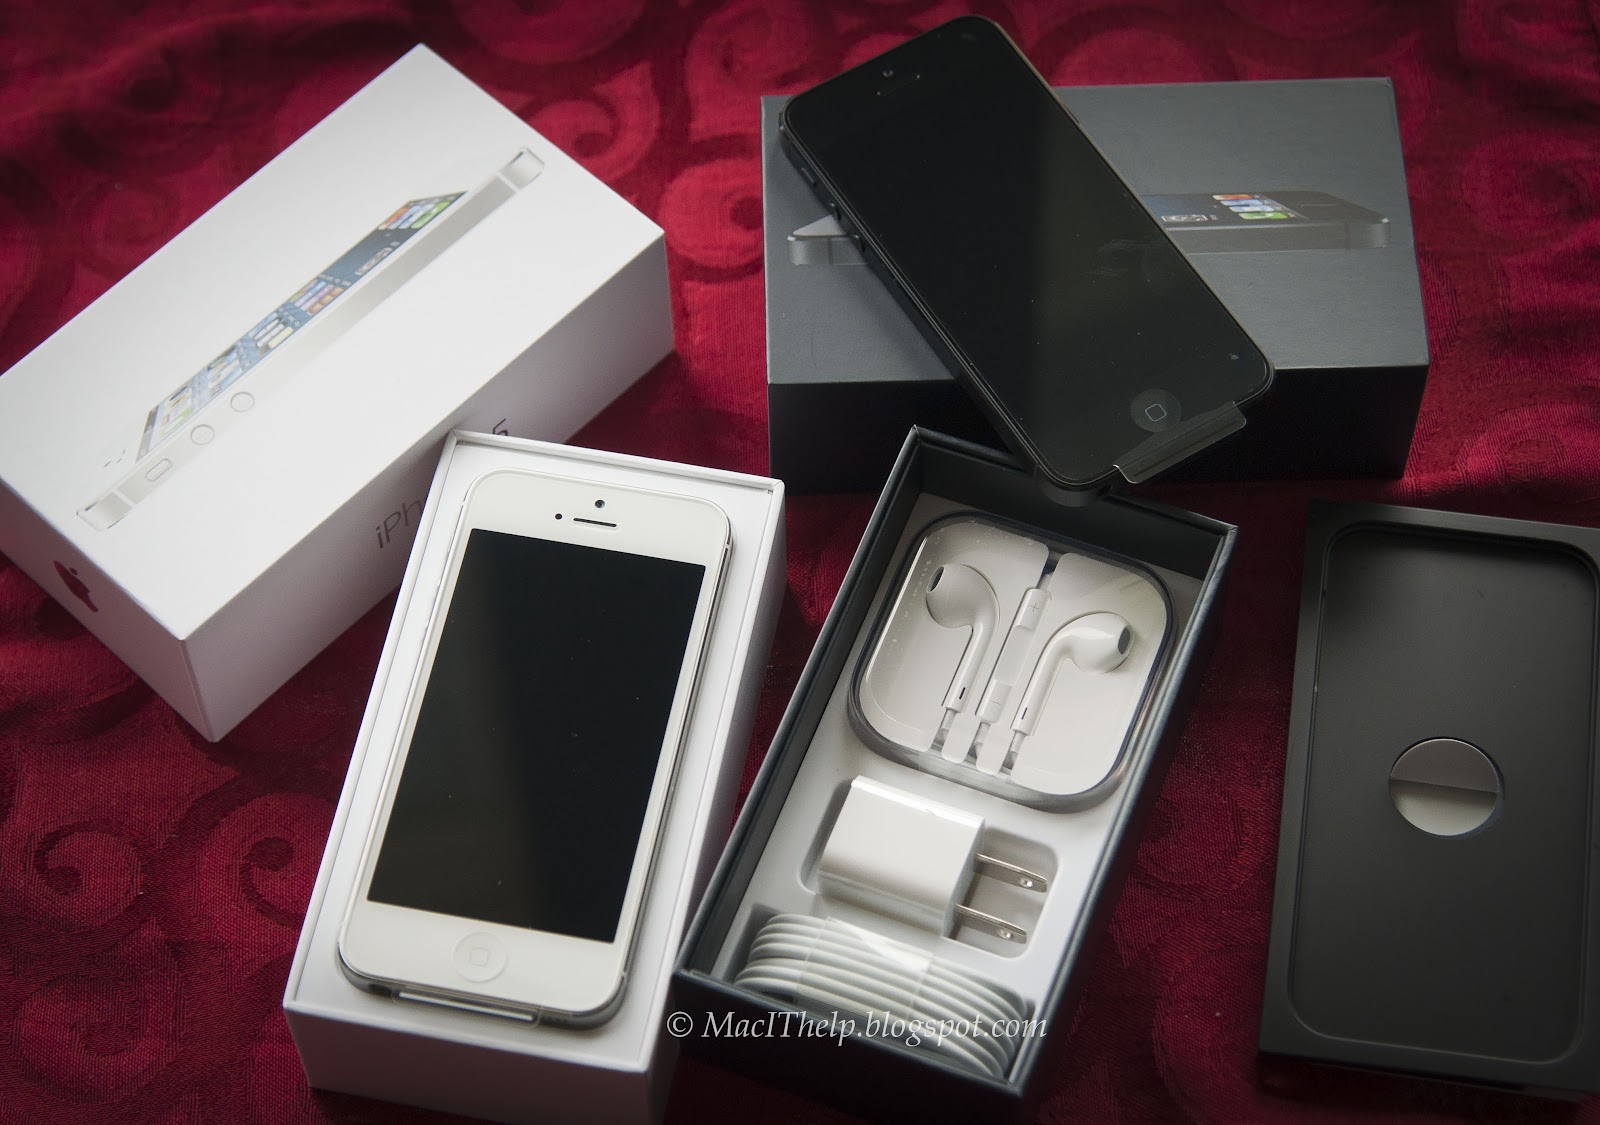
With a Blog titled "Mac IT Help" you would figure I was one of those early adopters of all things Apple, and you would be right, ... except when it comes to the iPhone.
My first Mac was the venerable Mac II color computer. Over time I worked my way through a PowerPC Mac 7100, Mac 7500, the original iMac, a Power Mac G4 and G5, as well as multiple iPods. Today I have an iPod Touch, iPod Nano, an iPad 3, several Mac Laptops and my workhorse PowerMac, but before Sept 21 2012 I didn't have a personal iPhone.
The company I work for provides a cell phone for business and personal use so to save a few bucks my daily use cell phone is a Blackberry. But that changed when the iPhone 5 was announced. I took the plunge, this week I decided to join the enlightened and buy an iPhone 5 for myself and upgrade my wife to the latest and greatest as well.
My decision wasn't made in haste, I thought about it for almost a full 5 seconds before I figured out I needed Apple's latest and greatest. It was time to treat myself to a personal phone that didn't suck.
It's kind of a pain to carry 2 phones during work hours but after playing with my new phone I've come to the conclusion it's worth it. This new Apple phone is a masterpiece of engineering and work of art.
Over the next few weeks I plan on publishing several iPhone centric blog posts but for now I'm going to go play with my new toy.
9/22/12
9/1/12
Bellevue Apple Store Grand Opening
Today was the grand opening of the new Bellevue Square Apple Store and the new location is gorgeous!!!

Another great feature of the store is the large skylight in the center. It gives the store a wide open feel, and in the normally dreary Northwest rain, will offer much needed exposure to sunlight, even if it's filtered through clouds.
If you have a chance to visit Bellevue I highly recommend you include a stop in the Bellevue Square Apple Store.
The whole front wall is glass and the store is about 4 times as large as the old one. The crowd gathered well before the 9:30AM opening and when they officially opened the store everyone rushed to grab a free t-shirt and look at all the great products.
The layout inside the new store includes areas for each of the major products and accessories.
The sales associates were out in force helping people spend their money.
The new store also has a lot more space dedicated to Personal Setup and a much larger Genius Bar
A little poking around revealed that each of the rectangles on the Genius Bar wall (see picture above) is actually a drawer filled with cords, parts and paperwork. A nice way to keep things tidy.
Another great feature of the store is the large skylight in the center. It gives the store a wide open feel, and in the normally dreary Northwest rain, will offer much needed exposure to sunlight, even if it's filtered through clouds.
8/23/12
Bellevue Apple Store Expansion
Way back in May of 2011 I wrote about plans that Apple had to move it's Bellevue Square to a larger footprint. Things have been very quiet for over a year but a little birdie told me that the new store will open in time for the arrival of the iPhone 5 and the coming Christmas shopping season. Let's hope that birdie isn't chirping out of the side of it's beak.
The current store has a narrow 30 feet of storefront and about 3500 square feet of floorspace.
The new store will be one of Apple's largest and located on the second floor of the same mall.
As a resident of Bellevue I look forward to a new updated store. When it opens I'll grab my camera and take a few photos.
UPDATE 8/27/2012
Here's some (below average) iPod photos I made when I made a trip to the Apple Store today.
UPDATE 8/28/2012
Just got an official Apple email letting me know that the new store will open September 1st!!
The current store has a narrow 30 feet of storefront and about 3500 square feet of floorspace.
The new store will be one of Apple's largest and located on the second floor of the same mall.
As a resident of Bellevue I look forward to a new updated store. When it opens I'll grab my camera and take a few photos.
UPDATE 8/27/2012
Here's some (below average) iPod photos I made when I made a trip to the Apple Store today.
UPDATE 8/28/2012
Just got an official Apple email letting me know that the new store will open September 1st!!
7/31/12
TiVo to Mac - Mountain Lion Edition
With every new OS update from Apple you get a lot of cool new features. Unfortunately you also get a few apps that don't work. One application I rely on for getting TV shows off my Tivo is iTivo. I wrote about it here in a previous post. After I upgraded to the new Mountain Lion OS I found that iTivo was broken. Now I had to go to plan B if I wanted to watch my favorite TV shows on my iPad or AppleTV. Thankfully plan B works great. It just takes a few more steps.
UPDATE - 2/20/2013
The work around outlined below works fine but as of 2/20/2013 iTiVo is working again. The application does needs a manual fix however. Please download the latest iTiVo and apply the fix outlined in the this MacITHelp post.
Our first step is downloading your TV show from your TiVo to your Mac. To get download your shows you first have to locate your TiVo on your network and log in. Did you know that you can actually log onto your tivo from any web browser? No, well you can but you need to know the IP address that your Tivo is using. The easiest way to figure that out is to use a free application called LanScan.
You can download LanScan from the Apple App Store here. Once you have LanScan installed start it up and scan your network. You should see a screen like this:
You will notice that my Tivo has the local IP address of 192.168.2.10. Armed with that information you can now log into your Tivo using your favorite web browser and grab your files.
Open up a browser window and type in the IP address you found above. For this login you will want to use a secure login so make sure to type in the "https://" before your IP
https://192.168.2.10
Once you do that you should see a login screen like this one:
The User Name will always be "tivo" and the password will be your personal Tivo Media Access Key (MAK). If you don't know what your MAK is follow these steps. On your TiVo box go to TiVo Central > Messages and Setup > Account & System Information > Media Access Key. Write that number down, you will use it a lot to get things working.
Once you log onto your box you will now see all your current recordings.
To download a show just click the download MPEG-PS link and your file will be transferred from your Tivo to your Mac. Remember though that it will be encrypted so your next step will be to decrypt the file.
The software to decode the TiVo files isn't a standard Mac application and runs under UNIX. To get things to work you will need to download and install a small UNIX application then build a script to use it.
Don't worry, it may seem daunting but I've done all the leg work so this is going to be easy. I've included a lot of screen shots for each step so just follow along. First you need to download a file set called MacOSX_tools from an application called kmttg.
Once you have it downloaded and decompressed it open up the folder and find the file called tivodecode. It's at the bottom and only 66KB in size.
You now need to start channeling your inner UNIX geek and use the terminal to copy the "tivodecode" file to a specific location on your Mac.
Open up the terminal application. You will find it in the Utilities folder inside the Application folder.
Once it's open you need to go to the /usr/sbin location where you will install tivodecode. Type in
cd /usr/sbin
Now type in "sudo cp" and drag the tivodecode file you downloaded to the terminal screen. When you drag a file onto the terminal screen it will automatically that files current location and type it in for you. Now finish the command by typing a "." The period says 'copy this file to my current location'. So the full second command might look like this:
sudo cp /FTP/kmttg_MacOSX_tools_v0p8l/tivodecode/tivodecode .
After you you are sure you have the command correct hit the return key. You will be prompted for your password and then the command will be executed. Hopefully everything will work fine and tivodecode will be installed. To check if it was copied you can perform the list command to see.
ls -al /usr/sbin/tivodecode
-rwxr-xr-x@ 1 root wheel 57096 Jul 30 16:32 /usr/sbin/tivodecode
You should see tivodecode listed rather than "No such file or directory".
Now that you have installed the software you will want an easier way to run tivodecode rather than use the terminal. The easiest way is to create a script. To do that use Apple's own Automator application located in the applications folder. Find it and open it up.
Once it is up select "New" from the file menu and "Application" as the type of Automator file you want to create. You will only need a 3 step script to decode your Tivo files. Here's a picture of the script.
Your first step is to select the "Files & Folders" icon on the left then drag the "Ask for Finder Items" into the window pane on the right. In the "Prompt" section just type in "Choose a Tivo file" and fill the folder location you normally use when you download your Tivo files.
Now select "Utilities" from the Library and drag "Run Shell Script" to the Window pane on the right. First make sure the "Shell" is set to "/bin/bash". In the Shell Script window type the following:
/usr/sbin/tivodecode -m <MAK> -o "/Folder/tivofile.mpg" "$@"
Remember to insert your real MAK address into the command and the real path to your output file.
If you have Growl installed you can add this final step. It isn't really required but it does help you to know when your file is done decrypting. In the "Utilities" menu find "Show Growl Notification" and drag it to the right side of the window. Now type in a title and description.
Now that you are done editing save the file and make sure it's saved as an application in the "File Format" drop down menu.
UPDATE -
It seems that some people are getting a "Bad CPU type" error when they try to run tivodecode. This is probably due to the compiled version downloaded above. There's a couple of things you can try to fix it.
Download tivodecode from Source Forge. You can try the latest version or an old version.
Some people have also had success extracting tivodecode from the old, non-working, iTivo application. Open the iTivo package contents by control+clicking on the iTivo application and selecting "show package contents". In the Contents/Resources folder you should find a copy of tivodecode. Drag a copy to the desktop (option+drag) and then move that version of the tivodecode file to /usr/sbin to see if things work.
UPDATE - 2/20/2013
The work around outlined below works fine but as of 2/20/2013 iTiVo is working again. The application does needs a manual fix however. Please download the latest iTiVo and apply the fix outlined in the this MacITHelp post.
Part 1 - Finding Your Tivo
Our first step is downloading your TV show from your TiVo to your Mac. To get download your shows you first have to locate your TiVo on your network and log in. Did you know that you can actually log onto your tivo from any web browser? No, well you can but you need to know the IP address that your Tivo is using. The easiest way to figure that out is to use a free application called LanScan.
You can download LanScan from the Apple App Store here. Once you have LanScan installed start it up and scan your network. You should see a screen like this:
You will notice that my Tivo has the local IP address of 192.168.2.10. Armed with that information you can now log into your Tivo using your favorite web browser and grab your files.
Part 2 - Logging into Your Tivo
Open up a browser window and type in the IP address you found above. For this login you will want to use a secure login so make sure to type in the "https://" before your IP
https://192.168.2.10
Once you do that you should see a login screen like this one:
The User Name will always be "tivo" and the password will be your personal Tivo Media Access Key (MAK). If you don't know what your MAK is follow these steps. On your TiVo box go to TiVo Central > Messages and Setup > Account & System Information > Media Access Key. Write that number down, you will use it a lot to get things working.
Once you log onto your box you will now see all your current recordings.
To download a show just click the download MPEG-PS link and your file will be transferred from your Tivo to your Mac. Remember though that it will be encrypted so your next step will be to decrypt the file.
Part 3 - Getting the Decryption Software
The software to decode the TiVo files isn't a standard Mac application and runs under UNIX. To get things to work you will need to download and install a small UNIX application then build a script to use it.
Don't worry, it may seem daunting but I've done all the leg work so this is going to be easy. I've included a lot of screen shots for each step so just follow along. First you need to download a file set called MacOSX_tools from an application called kmttg.
Once you have it downloaded and decompressed it open up the folder and find the file called tivodecode. It's at the bottom and only 66KB in size.
You now need to start channeling your inner UNIX geek and use the terminal to copy the "tivodecode" file to a specific location on your Mac.
Part 4 - Loading the decryption Software
Open up the terminal application. You will find it in the Utilities folder inside the Application folder.
Once it's open you need to go to the /usr/sbin location where you will install tivodecode. Type in
cd /usr/sbin
Now type in "sudo cp" and drag the tivodecode file you downloaded to the terminal screen. When you drag a file onto the terminal screen it will automatically that files current location and type it in for you. Now finish the command by typing a "." The period says 'copy this file to my current location'. So the full second command might look like this:
sudo cp /FTP/kmttg_MacOSX_tools_v0p8l/tivodecode/tivodecode .
After you you are sure you have the command correct hit the return key. You will be prompted for your password and then the command will be executed. Hopefully everything will work fine and tivodecode will be installed. To check if it was copied you can perform the list command to see.
ls -al /usr/sbin/tivodecode
-rwxr-xr-x@ 1 root wheel 57096 Jul 30 16:32 /usr/sbin/tivodecode
You should see tivodecode listed rather than "No such file or directory".
Part 5 - Creating a script to decode your Tivo Files
Now that you have installed the software you will want an easier way to run tivodecode rather than use the terminal. The easiest way is to create a script. To do that use Apple's own Automator application located in the applications folder. Find it and open it up.
Once it is up select "New" from the file menu and "Application" as the type of Automator file you want to create. You will only need a 3 step script to decode your Tivo files. Here's a picture of the script.
Your first step is to select the "Files & Folders" icon on the left then drag the "Ask for Finder Items" into the window pane on the right. In the "Prompt" section just type in "Choose a Tivo file" and fill the folder location you normally use when you download your Tivo files.
Now select "Utilities" from the Library and drag "Run Shell Script" to the Window pane on the right. First make sure the "Shell" is set to "/bin/bash". In the Shell Script window type the following:
/usr/sbin/tivodecode -m <MAK> -o "/Folder/tivofile.mpg" "$@"
Remember to insert your real MAK address into the command and the real path to your output file.
If you have Growl installed you can add this final step. It isn't really required but it does help you to know when your file is done decrypting. In the "Utilities" menu find "Show Growl Notification" and drag it to the right side of the window. Now type in a title and description.
Now that you are done editing save the file and make sure it's saved as an application in the "File Format" drop down menu.
Part 5 - Running the Script
This is the fun part. You have all the pieces in place to download your Tivo recordings & decrypt them. Start up the appliclation you just created and select a .TiVo file.
Once selected you will see the command you set up to run with your real MAK. If you want to change the location of the file or the file name you can do so here. Just highlight the text you want to change and type in a new name or path.
Once you hit continue your file will process in the background and eventually you will see the notification that your file is done decrypting. VOILA!! you are finished.
As you can see, it would be much easier to use the iTiVo application but until someone fixes it you have a work around. It's a lot of steps but nothing difficult. Let me know how it works out for you. When iTiVo pushes out an update I'll let you know.
UPDATE -
It seems that some people are getting a "Bad CPU type" error when they try to run tivodecode. This is probably due to the compiled version downloaded above. There's a couple of things you can try to fix it.
Download tivodecode from Source Forge. You can try the latest version or an old version.
Some people have also had success extracting tivodecode from the old, non-working, iTivo application. Open the iTivo package contents by control+clicking on the iTivo application and selecting "show package contents". In the Contents/Resources folder you should find a copy of tivodecode. Drag a copy to the desktop (option+drag) and then move that version of the tivodecode file to /usr/sbin to see if things work.
7/10/12
Connecting Remotely Using BTMM - From Someone Else's Machine
There are a lot of Mac applications available that will let you connect to your Mac when you are away from home. All of the easiest to use applications have some sort of registration so you can find your Mac out of the millions that are using the Internet at any given time. Apple has one of the best remote access applications built into their OS. It's part of Apple's free iCloud service and called "Back-to-my-Mac", or just BTMM for short.
When you register each of your Macs with iCloud, and enable BTMM, the software allows you to access any of your Macs disks or share the screen remotely from where ever you are. If you are sitting on the Lanai of your beach condo in Hawaii and need a file from your home computer just connect to Mac and mount up your hard drive. Copy the file and you are done. Even better, if you want to operate your Mac remotely just click the "Share Screen" button and log in.
The one drawback to all this remote convince is trying to connect from a Mac that isn't yours or is associated with a different iCloud user back to your machine. The good news is that with a little preparation and the right software you can do it! To get things working you need to gather some specific information and set up your Mac.
The one key piece of information you need to know is your Mac's Internet address. This is a unique number that identifies you to the internet. Most Internet Service Providers (ISP) assign you a dynamic IP. That means that you will never know what it is on any given day unless you write it down. There are free DNS services that will associate a name to your IP address but thankfully, for Apple iCloud users, Apple does this for you! To find out your DNS name all you need to do is open up the Terminal application located in your Utilities folder and run a simple command.
First off, don't be afraid of the command line. You just need to run one simple command, write down the information, then quit terminal. The command you need to run is the multicast DNS service discovery. It will figure out the DNS name associated with your iCould account.
$ mDNS -E
Looking for recommended registration domains:
Talking to DNS SD Daemon at Mach port 5891
14:42:11.478 Recommended Registration Domain local. Added
14:42:11.479 Recommended Registration Domain <.Mac ID>.members.mac.com. Added
14:42:11.479 Recommended Registration Domain XXXXXXX.members.btmm.icloud.com. Added
As of MacOS 10.7 Apple is still using the .Mac members DNS name even though it no longer works for this particular VNC use. The DNS name you need to copy is your iCloud DNS name. In the example above it's the last line. The results will have a unique number associated to your iCloud account name.
12345678.members.btmm.icloud.com.
Now you need to make sure your Mac is set up. Open up the system preferences and select "iCloud" under "Internet & Wireless" and click the "Back to My Mac" check box.
Because you can have multiple Macs associated with a single iCloud user ID you also need to identify which Mac you want to connect to. For each Mac associated with your iCloud user ID open "System Preferences" and click the "Sharing" tab. Write down the "Computer Name:" that appears at the top. In the case below it's just "iMac".
Lastly you will need to enable VNC connections for your Mac. Select "Computer Settings" in the same "Sharing" Preferences panel, check the VNC box and type in a strong password. Because your machine is accessible from outside your firewall I suggest using upper & lower case letters, numbers and characters (!,@, #, etc.)
You are now set up and have all the information you need to connect to your machine using your favorite VNC app. One of my favorites is Chicken of the VNC. You can download it here.
Once the application opens just use the new connection command in the "File" menu. in the host: box type
<computer_name>.XXXXXXX.members.btmm.icloud.com
An example might be
iMac.12345678.members.btmm.icloud.com.
<computer_name>.XXXXXXX.members.btmm.icloud.com
An example might be
iMac.12345678.members.btmm.icloud.com.

When you connect you will see a login box. This is where you type in the VNC password you just set above.
If you don't want this box to appear you can enter your VNC password in the VNC Login screen and select "Remember Password." After your VNC connects you will see your Mac's login screen.
Select your user and log in! If everything works as planned you should be now be logged into your machine.
6/23/12
Dragging Analog into Your Digital World
For all the recent hype about Apple's new hardware and the new features (Solid State Drive, Retina Display, No DVD/CD Drive) the one constant is the need for something good to put on your shiny new Mac. Today I want to concentrate on how to get your data onto your Mac.
When people think about data they usually think about text documents, old email, music, movies & photos. If you already have digital data moving it from an old computer to your new Mac, even one without a CD/DVD drive, is easy. Just use your WiFi network, drag and drop. But what about digitizing your old analog data? What about documents that aren't in digital form or old photographs your parents or grandparents gave you? This is where scanners come in.
Scanners may be something out of the 1990's (has it really been over 20 years?) but they work well and give you a high quality output. I own an Epson Perfection 3170. A great scanner for it's day and one that still works well. A quick trip to your local thrift store and you will see that a lot of people have dumped their scanner thinking they will never need it. But if you want to bridge the analog/digital divide then a scanner can come in handy.
If you do own a scanner your next question is how to use it. Although most of the major manufactures have their own software most of that software is out of date junk. The rapid updates of Mac OSX often renders all those applications useless. Not to worry. Did you know Apple has a way to scan using Apple's own software that comes with every Mac? Today I want to show you how to use the ubiquitous Preview application with your scanner.
Scanning with Preview
1) Turn on the scanner and open up Preview
2) Under the "File" Menu select "Import from Scanner" and select your scanner
3) You will now see a blank page with less than basic scanner functions available. In order to really take advantage of the power of your scanner you need to select the "Show Details" button at the bottom.
4) Now the fun starts. Selecting "Overview" will give you a preview scan of your photo. From this you can select the image and crop to the desired size. Once you have set the scan area you can now balance the color.
On the right side of the window are the controls to help color balance and correct the image. There aren't a lot of controls but tweaking the sliders can greatly improve your photo. If you are familiar with iPhoto you shouldn't have any issues figuring things out. If not, just experiment and with the sliders until the photo looks right to you.
As a last step before scanning make sure to change the resolution to a value that suits how you are going to use your photo. If you just want to email it or post it on Facebook you only need to set it at 100 dpi or so. If you want to take your file to your local drug store to get a reprint or you want to edit it in Phtoshop then scan it at a higher resolution.
5) Once you are done adjusting the color just select the "Scan" button at the bottom, save the file and you are done.
There may be better scanning applications out there that give you greater control of your output but convenient and free sure is nice!
Subscribe to:
Posts (Atom)