3/30/14

Geek Day off 2014

Last year I did a post titled "What do Geeks do on their Day off?" about Seattle's amazing Emerald City Comicon. I loved it so  much I went again this year.  It was again jammed with artwork, comics, TV stars, & people dressed as their favorite characters and was a a great break from the more technical side of my brain. 

So here are this years photos for all to enjoy!


Badges are a must and I picked up 3-Day passes as Christmas gifts for my family. 


Off to the Con!


Comic Con wouldn't exist without comics and the artists that create them. Unlike some of the bigger Cons (San Diego, L.A. etc.) Seattle prides itself on putting the artists front and center. There are booths and tables filled with the famous and not yet famous. Most of the time the artists sell prints, postcards or paintings to help make ends meet. 


The part that most fans love is dressing up. Just pick someone from your favorite Anime Series, TV Show or Movie then make your own costume and go have fun.


Here's an example of a my daughter as Jack Frost (on the right) and two total strangers dressed as Anna & Elsa from Disney's Frozen. At the Con everyone is a friend you haven't met yet and sharing stories about your costume is expected. 


Some people go to extreme lengths to get just the right look. This guy was AMAZING! I started talking to him and found out that his armor was hand made. Each piece was individually formed acid etched or burnished then put together. And I love the eyes! It made for a great finishing touch.

Here's a collection of some of the people on the show floor.


Link was well represented this year. 


This fairy spent a lot of time getting her ears & wings just right. 


The Hulk


Loki obviously spent some time on the details

There were a ton of kids in attendance and a lot of them were in costume too. I feel in love with this Minion outfit. A ton of mom and dad bonus points to the parents of this little guy.


There were a ton of people dressed as their favorites from movies. It's always nice to see someone dress up in a way really fit's with their own looks. This version of Oswald Chesterfield Cobblepot rocked!


 And this Mr. & Mrs Shrek really hit the mark as well. 


Steampunk was big this year with a lot of Steampunk versions of Disney characters.


I really liked the Steampunk Tinkerbell.


I even found the whole Waldo family!


At about 6' 5" This Wonder Woman really made an entrance.


This one was subtle. Dressed to kill (literally) this woman could only be Irene Adler. Stunning to say the least. I had fun playing with Photoshop to get this photo.


ECCC is for all ages.

One thing that also goes on is selling autographs & Photos with a star. This year ECCC had Karl Urban from the TV show Almost Human & the Star Trek Movies, Stephen Amell from the TV show Arrow, Richard Dean Anderson most widely know for his role as MacGyver, John De Lancie & Michael Dorn from Star Trek and Eliza Dushku from Serenity, Buffy & Dollhouse. You can check out the full list on ECCC's web page. 

They also had famous CosPlayers. Here's YaYa Han in costume.  


Because ECCC is about comics they also had well know cartoonists. My family loves Jan Elliot and her comic strip "Stone Soup" She is a wonderful person and we spent about 5 minutes or so just talking about her strip.


And of course there are things to buy. If you ever go, take cash. Lots and lots of cash. 


Star Trek Fez anyone?


Everyone needs a sword right? But maybe a tee-shirt is a bit more your style. Which one? Maybe you can grab one next year!!


2/1/14

New MacPro & DRM - Gotcha!

I am loving my new MacPro. Having traded and upgraded through a series of Macs, this is without a doubt my best Mac yet. So tell me, why do DRM & HDCP have to ruined my day?


* details of setup below


Setup

Let me step back a minute. Did I mention that when I upgraded from my old Nahalem 2009 MacPro to my new late 2013 MacPro I also got a Thunderbolt Display? I was hoping for an inexpensive (yeah right) Apple 4K monitor but the 27" Thunderbolt display is beautiful and quite a step up from my old Apple 23" Cinema Display. Because it was in stock, the monitor arrived many weeks before my Mac. Since it was just sitting there I opened it up and tested it out using my wife's MacBook Air and daughter's MacBook Pro. Both laptops worked perfectly and we had a great time watching HD movies on my gorgeous new screen. 


The Problem 

When my new Mac finally arrived I immediately set everything up and started to test things out. My new Mac was fast. I mean Usan Bolt fast! A few hours later I figured it was time to relax so I popped in a DVD using my new external LG Blu-ray player and sat down to watch. When I fired up DVD Player this is the screen I was greeted with:


What The France!!!  Being the trouble shooting type I tried various other DVDs all with the same result. I immediately suspected Digital Rights Management (DRM) was the cause so I opened iTunes and tried to play a purchased movie:


I couldn't believe it! I knew that HD content wouldn't play through my old Mac's AVI connection but at least it would play DVDs. When I bought my new set up I "assumed" that the digital nature of the Thunderbolt connection would allow full 1080p glory on my new display. To say the least, I was pissed. 

DRM & HDCP

After poking around on the web and doing a little research here's what I found out. The presence of a graphics card with HDCP support installed on the Mac Pro is detected by iTunes and prevents HD content from being displayed unless your monitor has HDCP support.  The Thunderbolt Display does not have HDCP support. 

What is HDCP you ask? HDCP stands for High-Bandwidth Digital Content Protection, a copy protection scheme to eliminate the possibility of intercepting digital data midstream between the source and the display. It's basically a format designed by Intel to curry favor with Hollywood. Here's an explanation from one of the websites I found:

"A simple answer is that an HDCP session will result in the exchange of keys between the source and display device.  The source device will query the display to make sure that the equipment is HDCP compliant before video is shown.  Non-HDCP devices such as PC's and older model DVI products will work with any DVI compliant display, but the HDCP compliant boxes will show an image only on HDCP compliant display."

That means if your clunky old MacPro has a non-HDCP graphics card it will work with your non-HDCP display. But your brand new MacPro that does support HDCP won't work on your brand new non-HDCP monitor. HD content cannot be played on any non-HCDP compatible device. Period. You can download and play the SD version of iTunes purchases for free but where's the fun in that?

While HDCP appears to only provide point-to-point encryption between the graphics card and the monitor, it seems that the presence of a graphics card with HDCP support disables at least some of the software video decoding logic in iTunes.  It's assumed that the monitor has the necessary hardware logic to perform the video decoding.

I'm no expert but after poking around a little bit I found references to software hooks that enable DRM & HDCP as well as the hardware chip in the graphics card and monitor. So Apple is also complicit and wrote in some DRM switch in Mavericks, DVD Player & iTunes that made playing HD purchases as well as DVDs impossible unless you have a HDCP monitor. The good news here is that all internal display devices that Apple makes (iMac & laptops) support HDCP and will play everything. 

The Solution

That last bit about software hooks got me thinking: Are there other non-Apple applications that bypass DRM & HDCP?  Why yes there are!


To play DVDs I found two free applications. The first is Wondershare Player. It's a fine application and works with a lot of video file formats. I did have mixed results with DVDs so I kept looking and found DVDFab Media Player. Which I have set as my default DVD player. 

When you open DVDFab you get the a splash screen that asks you to open a file or your mounted DVD.


Once you select your DVD it opens up and plays just like you would expect. The only thing to get use to are the controls. To control your DVD you just need to hover the mouse at the edges of the movie. If you hover the mouse on the bottom you get the standard play menu.


 If you hover to the right you get the DVD Menu control


Hover at the top you get screen controls, chapter selection, sound & a camera icon to take screen shots. 


Blu-ray & DVD player

The best news of all was that DVDFab Player also plays Blu-ray disks! AWESOME! I did have a copy of Mac Blu-ray Player that I received in one of the many Mac bundle deals that were held during the holidays, and it also worked well for both DVD & Blu-ray disks. For me though, you can't beat free. I need to test things out for a few weeks but for now DVDFab will be my default player.

Lessons Learned

The internet has been around for a while and wether we know it or not we have all accepted DRM. When you use Netflix, Amazon Prime, or any internet movie streaming service you are using DRM. It requires hardware as well as software support and you need an Internet connection to make it all work. 

The challenge for me comes when you have purchased a new computer or TV, then hook it up with your brand new Blu-ray or DVD player and insert your very own purchased copy of your favorite movie then can't watch it. It's just wrong.

Thankfully there are work-arounds for watching Blu-ray & DVD shows. Too bad there is no easy answer for purchased iTunes content. To watch those movies and shows you either need to download the Standard Definition version or learn how to crack Apples DRM. Either way it's a pain. 

So what is the lesson here?  When you purchase your next DVD/Blu-ray player, Computer, Computer monitor, TV set, or other media device make sure you make sure it's HDCP compliant. Right now Hollywood is making all the rules so if you want to watch your shows you need to play the game. 


* My Setup

  • Late 2013 MacPro
    • 3.5 GHz 6-Core Intel Xeon E5
    • 16GB 1866MHz DDR EEC RAM
    • 512GB PCIe Flash Storage
    • Dual FirePro D500 Graphics Cards
    • Apple USB Keyboard
    • Logitech Anywhere MX Mouse
    • Apple Trackpad
  • 27" Thunderbolt Display
  • LG Blu-ray Player 14X USB 3.0
  • CalDigit T3 Thunderbolt RAID enclosure
  • CyberPower UPS System - 1350W
  • Apple 2GB iPod Nano
  • Apple iPod Touch 4th Gen
  • Apple iPod Nano with watch band
  • Apple iPhone 5
  • Apple iPad 3rd Gen
  • Apple iPad 2nd Gen


PS - That large opening in the lower cupboard area is where my old MacPro fit. Amazing that Apple was able to fit all that power into their new MacPro. I now use it for my external RAID enclosure and UPS system. 


UPDATE: 

It was brought to my attention (thanks Mike!) that I missed the fine print when I downloaded DVDFab player. Sure enough, after digging through the preferences I found this screen.


Bummer!  Not that it isn't a great product, it is! But I like to try out free apps and see if I really need the extra features of a paid application. That's when I realized that VLC, the do everything open source, video application does play DVDs. You can read about all its features here. 

VLC decrypts DVDs through the libvdss library and it must be loaded in order to play DVDs. If you can't play a DVD you might need to install it. You can download it at this site:

http://download.videolan.org/libdvdcss/1.2.12/macosx/

This form thread may be helpful for installation

https://forum.handbrake.fr/viewtopic.php?f=5&t=23301&p=106325&hilit=vlc#p106325


To play a DVD just open up VLC and at the initial screen just drag the DVD icon from your desktop to the player screen. It might take a while but when it's loaded it will automatically start to play.


When I finally settle in on the DVD player I like the best I will let you know. 


1/22/14

30 years of Macintosh, 26 years of my Macs


When you calculate the age of your dog, the rule-of-thumb was that one dog year equals seven years for a human. This may not be accurate but it’s an interesting way to look at life. When I look at computers I think that rule-of-thumb should be 1 year of computer life equals 2 or 3 human years. So when I see that Apple’s Macintosh is 30 years old this month my mind see’s that original 9 inch black & white screen as a very old man.


On January 24th 1984 Steve Jobs introduced the first Mac. It was amazing. It was ground breaking. The original Super Bowl ad was fantastic. Everything about the machine made my jaw drop. I was working in the University of Washington Bookstore at the time and I was one of employees selected to sell them. In an era of CP/M, MS-DOS, Kaypro & Osborne the Mac was a star. I wanted one. I wanted one BAD! Being a newlywed and new college graduate in a poor economy, the only thing I could do was drool. It wasn’t until late 1988 that I finally pulled the trigger and bought my first Mac, the color-capable Mac II.

Mac II  


Being the frugal type that I am, I bought my Mac II used from a software development company. It was still expensive but I didn’t care. I had a computer and it was a Mac! It had a Motorola 68020 16MHz CPU, 1 MB of RAM, a 20MB hard drive, 2 floppy drives and a 13” color Apple monitor. I mean, wow! This thing was amazing! I loved that computer. My family still remembers my endless hours in front of the monitor playing Solarian II (Can someone please bring that game to the iPad!). But all good things come to an end. Soon, 2 or 3 OS upgrades later my new toy started to seem slow and I knew it was time to upgrade.


My next Mac was one of the new PowerMacs with a PowerPC 601 chip in it. That thing was fast! After 4 years (That’s 12 computer years for those of you keeping track) of using that slow, old Mac II I finally had a machine that I could use without screaming at it to go faster. By this time my love of computers had rubbed off on my family. It was at this time that the PC vs. Mac war was in full bloom and I was happy when my dad bought his first computer, a PowerMac 7500. Another convert was won. It was also a bonus for me because 2 years later my dad upgraded to a new PowerMac 9600 and I got his old 7500.


The great thing about Apple’s Power Mac was the NuBus architecture. A lot of 3rd party manufacturers made upgrade cards for these machines. When my dad gave me his old Machine I sold my 7100 and used the money to buy a PowerPC 604e card. Once again I had the fastest machine on the block.

It was now the early 90’s and home computing was really taking off. Too bad the PC was winning. I remained faithful to the Mac but I was one of the few. Most of my friends had long since moved to the dark side and had embraced Windows. Steve Jobs had left Apple in 1985 and the Macintosh was a mess of too many models and too few sales. That changed in 1996 when Apple bought NeXT and Jobs returned.

My next computer was the Jobs & Ive designed translucent, egg-shaped G3 iMac. Mine was a red one and we loved it.


Lousy puck mouse aside, this machine was wonderful.  It was compact, fast and was the first computer to offer USB standard! It was at this time that my kids were old enough to be fighting for the computer. This was a problem until my generous parents bought them each one of the new Apple laptops, the iBook.


These clamshell machines were wonderful. Some said they looked like toilet seats but compared to other laptops of the day they were sturdy, fast and made mobile computing something you wanted to do. Of course you still needed a desktop for serious work.

In 2001 I finally went to my first (and only MacWorld). It was at the 2001 event that Jobs introduced iTunes, thePowerBook G4 and demoed OS X, but for me it was all about the new G4 Power Mac (Digital Audio). When they were available I ordered mine and waited for it to arrive.


This was a wonderful Mac and really showed that Apple design was firing on all cylinders. I bought mine with a 733MHz G4 CPU and it was fast. It was expandable and had a lot of room inside the case but the big addition was the brand new DVD SuperDrive! I could now burn DVDs that I could play back on my home DVD player. It took a while to write all that data but what a huge leap in technology over those small CDs I had been using. Time marches on however and 4 years later I was ready for an upgrade.


The move to the G5 was big. And by big I mean that the case was huge! Beautiful, but huge. Of course that meant a lot of internal drives for extra storage so I didn’t mind a bit.

The IBM PowerPC G5 was a lot faster than my old G4 and suddenly writing to that SuperDrive wasn’t quite so bad. Too bad that it was also one of the hottest Macs around. Although mine never failed, it could and did heat up a room. If you put your hand at the rear of the machine it was like a blow-torch.  To fix this and other problems Apple finally made the leap to Intel in 2006. Having just bought my G5 in 2005 I didn’t make the switch until 4 years later in 2009.


Looking back on things, I’ve upgraded machines about every 3 ½ to 4 years. Macs are quality machines and unlike commodity PCs are usable for many years. Because of my 3 or 4 year upgrade cycle I jumped into the Mac Intel world a little late. OSX was the established operating system and old PowerPC code still ran but if you wanted to see the speed you needed to move to Intel so in mid-2009 I purchased the Xeon Nehalem Mac Pro.

The new case was even bigger than the G5 and I used every slot in the machine. I put in extra drives, a USB PCI card or two and even a 2nd DVD drive. It was wonderful but I knew that in 3 years or so I would start looking for the next model. So I started saving right away.Too bad Apple was spending all it’s time going mobile.

I won’t belabor the point here just know that starting about 2011 there were a lot of Mac Pro users clamoring for the next iteration of Mac Pro. Where was the love Apple!? Where is the updated Mac Pro?

Things finally came to a head in 2012 when Apple CEO Tim Cook answered an email from a disgruntled Mac Pro user  and said that Apple was “working on something really great” for 2013. It wasn’t until June of 2013 that we finally found out what that “really great” thing was when Apple debuted the new Mac Pro. In December of 2012 Apple finally made it available to order.

My name is Bruce Craig and I’m a Mac addict. It’s now been 5 years since my last upgrade and I’m falling off the wagon. Today, my new Mac came. I’ll let you know how it goes.



1/4/14

Using Photo Stream to Save All Those iPhone Photos


One of the things my family loves to do is take a lot of photos. Now that we all have iPhones we take even more photos than ever! The biggest issue with all those photos is making sure they are safely backed up. You never know, you may lose your phone or your IT spouse may "helpfully" delete them off your phone to save some space. The Readers Digest version is this: In order to permanently save your iPhone photos you need to download them to your computer. To do that I use Photo Stream. 


To use Photo Stream you need an iCloud account and an Apple Device (iPhone, iPad or iPod Touch). There are a lot of benefits to enabling Photo Stream but there are also limitations. I'll go over those in a second. 

To set up Photo Stream first make sure you have an iCloud account then go to “Settings" and "iCloud" then choose “Photos” and enable “My Photo Stream"


Once you have PhotoStream enabled all photos you take are automatically uploaded to your iCloud account. Here's my list of Photo Stream basics that everyone needs to understand.

  • Photos uploaded to Photo Stream do not count against your iCloud storage. so your basic 5GB iCloud isn’t impacted by the number of photos you take. 
  • By design, Photo Stream only keeps the last 1000 photos in a rolling album. If you are on a trip and take a LOT of photos only the last 1000 are kept. If you take 1001 photos then the first one you took will be deleted out of the album.
  • Photo Stream photos are saved on the Apple iCloud server for 30 days from the date you added them to Photo Stream. After that they are DELETED!

  • If you shoot in burst mode only the final composite image will be uploaded to Photo Stream.
  • New photos are automatically uploaded to your Photo Stream when you leave the Camera app and are connect to WiFi. They won't be uploaded over cellular connections.
  • If you delete a photo from your camera roll it won't necessarily be deleted from the cloud if it's already been uploaded to Photo Stream. This can cause some embarrassing moments if your AppleTV is set to display your photo stream as a screen saver. (please don't ask how I know this!)
  • If you sign out of iCloud or turn off Photo Stream all photos are removed from that device. Other devices aren't affected. 
As I said above, if you want to save your photos permanently you will need to download them to your computer. The easiest way to do that is use Aperture or iPhoto. Since it comes free with every Mac I use iPhoto.


In the iPhoto Preferences there is a setting under iCloud to make sure the photos are downloaded. 


Once that is done, all your photos will be downloaded to your iPhoto library and appear in Photo Stream Events organized by month. Even if your photos are more than 30 days old and no longer in iCloud they will be saved.

Now that you have all your great photos on your Mac just make sure your backup software is backing up your iPhoto library. You never know when your HD might fail!


10/30/13

Use cTiVo to download your TiVo programs to your Mac

In the past, one of the only options available to transfer files off your TiVo and onto your Mac was iTivo. It is a simple utility that performed admirably  when it worked. The biggest issue was it's infrequent updates. Every time Apple Mac OS was updated you needed to use your terminal skills to get iTiVo to work again. I've written several blog posts giving instructions on how to get iTiVo working after the upgrade to Mac OSX 10.8 Mountain Lion.

Tivo & the Mac - Downloading Tivo files
Continuing Adventures with iTiVo
TiVo to Mac - Mountain Lion Edition
TiVo to Mac - iTivo Update

Recently Apple just released Mac OS 10.9 Mavericks and once again iTiVo was broken. Rather than dive in and try to fix it I hit up Google to see what everyone else was saying. Low and behold I stumbled across an application called cTivo.  


All I can say is WOW! Finally! An application that works out of the box without any terminal tweaking. Where have you been hiding cTiVo?!?

cTivo describes itself like this:

"cTiVo is inspired by the great work done on iTiVo, but written in Cocoa/Objective C for better performance and compatibility. Current or former users of iTiVo will find a detailed comparison and upgrade path described in iTivo Users."

It's much faster than iTiVo and once you put in your TiVo's MAK address it will scan your network for all your TiVo devices. 

There are a lot of preference settings to play with that give you tons of options.


You can download the decrypted file or transcode it to many different formats to match your device.


Once you have selected the show to download and the format you want click the download button and it will start to download. 


Download progress is marked with a red highlight bar. Additional files are queued up and automatically downloaded when the first file finishes. 

If you have used iTiVo in the past, run, don't walk, and download cTiVo. It looks like the days of struggling with iTiVo are over. Unlike iTiVo the last update for cTiVo was 2014. I just hope that the developers keep the updates coming. 

10/25/13

iBooks for Mac - Loading books on your iPad

Because I'm a glutton for punishment and a willing guinea pig I loaded the new Mac OSX 10.9 Mavericks on Tuesday the same day it was released. There a ton of great reviews of Mavericks out there but since I read a lot I want to focus on the new iBooks application.


First Some History

When Apple first released iTunes it was a music player and it worked great. Over the years, as Apple continued to add other media, they used iTunes as their application of choice to control and house media files. 


As movies, TV shows, Podcasts & books were added under the iTunes umbrella it grew bloated and disorganized. The name "iTunes" became a misnomer. They should have renamed it iMedia or iJunk-Drawer. With the latest release of Mac OSX Mavericks Apple has finally started to correct that mistake and pull iTunes apart. With the release of Mavericks Apple has moved books to the new iBooks application. Now you can not only store your books in a library but actually read them as well.


Running iBooks

When you start iBooks for the first time it moves all your purchased books as well as your personal epub books to the new iBooks library. 

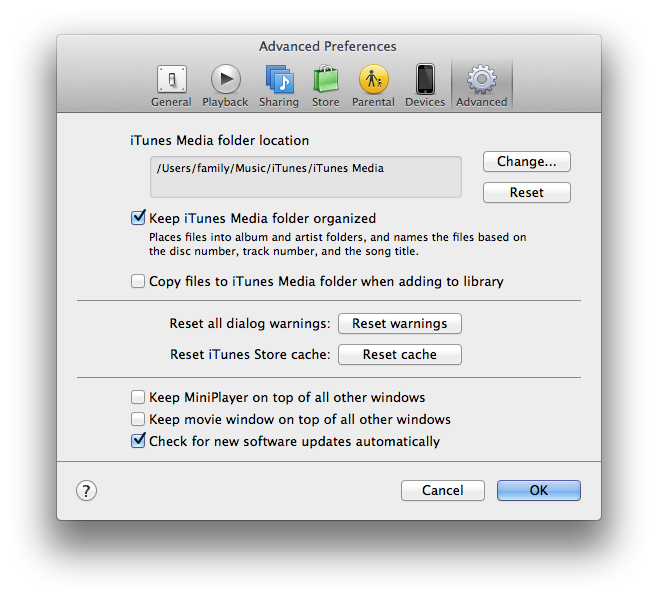
Here's an interesting tidbit of info for you. I personally like to control where my media lives so my iTunes library preferences is set to not copy media to the iTunes media folder when I add new files. 

What I found out was that iBooks doesn't have this ability and on startup it automatically moves all your purchased books currently resident on your computer to the iBooks library. Any book purchases still in iCloud that you haven't downloaded will not be moved.


If you have personal epub (non-DRM) books in your iTunes library those books will be copied to iBooks and the original file left alone. All iBooks files are now located in your personal library folder inside your home directory:

~/Library/Containers/com.apple.BKAgentService/Data/Documents/iBooks/books

Make sure this is directory is backed up if you plan on keeping your personal epub book library in iBooks.


PDF Files

There are a few issues with how iBooks handles PDF files. When you open PDF files from within iBooks they will open in Preview not iBooks. All those great features that Apple touted don't work in Preview.


How to actually load books on your iPad!!!!

The biggest issue I had was figuring out how exactly to get your books from iBooks onto your iPad. The easy answer is you can't. When you open iBooks and plug in your iPad it doesn't show up in any iBooks window as you might expect from years of iTunes experience. In order to load books to your device you have to use iTunes. 

"What?!!!" you say? "That doesn't make sense."  If you are like me you expect a new application dedicated to books to be self contained. I expected iBooks to store your books, enable you to read your books and load your books on any iDevice you have. But it doesn't. Frankly that feature alone says that iBooks isn't ready for prime time and Apple should have waited to release it. For a company that is known for great industrial design and user interfaces this is a debacle. 

Here's what you need to do to manage books on your iDevice.

  • Open up iTunes and plug in your device.

  • Select your device in the sidebar and click the books tab and check the "Sync Books" Check box.
  • You will get an very scary looking dialog box that looks like this.
  • Believe what it says! It will remove all your existing music, movies, TV shows & Books from your device.
  • Once iTunes is done syncing you can manually check the books you want to load your device with on a book by book basis. The obvious downside is the cumbersome nature of dealing with large libraries. If you download a lot of technical documents and PDF files like I do and use decide to use iBooks as your default library application you may find yourself with 100's of books to scroll through.

Manually load your personal PDF & epub books. 

The quick an easy way around a lot of these problems is to use an application like Calibre to manage your book library & metadata then manually add them to iBooks by dragging the file from it's Finder folder directly to your iPad in iTunes.  


Quick summary of my issues with iBooks 


  • You can't do a get info on a specific title
  • You can't edit meta data for your personal books - No changing cover art, author or any other information.
  • There is no direct way to load a book to your iDevice from iBooks
  • PDF files use Preview
  • Files can't be stored outside your library as they could in the past

Conclusion

I'm sure that over time Apple will fix all the niggling little (and big) issues with iBooks. I just wish that such a heavily advertised new feature was as great as Apple hardware. This application feels more like a beta release than something that shipped with a the fanfare apple gave it.


One last thing

I haven't tried it but here are some instructions to restoring book management to iTunes rather than iBooks. *Warning* Use at your own risk!


  • kill the bookstoreagent service using Activity Monitor
  • Delete file associated with that service
/System/Library/PrivateFrameworks/CommerceKit.framework/Versions/A/Resources/bookstoreagent


  • Use AppCleaner or similar utility to unistall the iBooks application
  • Restart iTunes
  • Import your books again